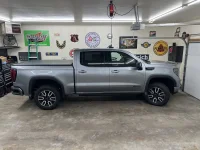
What did you do to your AT4 today?

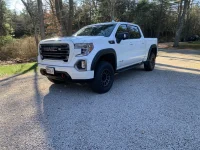
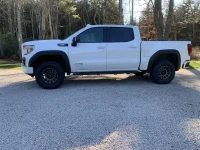
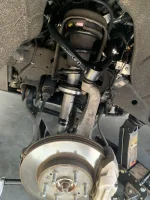
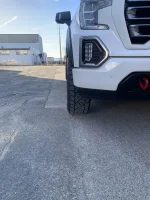
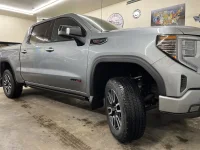
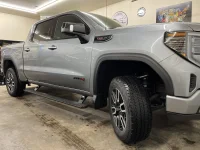
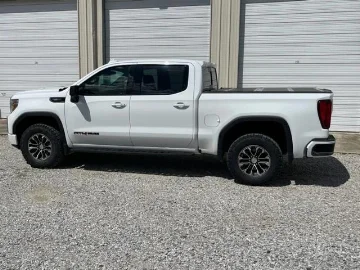
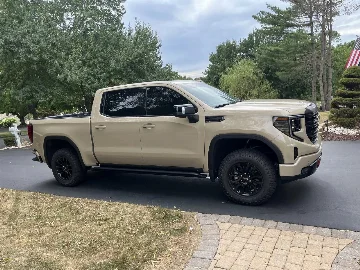
Just finished installing Readylift 2.0 SST, Fox 2.0 (front), and Bilstein 5160’s (rear). Had a terrible time getting the stock ball joints out due to the taper and not wanting to crack the aluminum casting w/ metal hammer (went with metal hammer anyway and everything came right out). If you’re methodical with your work, will probably take 8 hours assuming disassembly being a b$tch but my truck is also 3 years old too. I tried installing without the preload spring spacer first but you lose 1” of height without it. If installing Fox 2.0’s - you’ll need to grind down the supplied plastic spring seat to fit the ready lift preloaded spacer, you can kind of see it in the picture but not super clear (readylift 2.0 SST is meant for Rancho shocks but if you’re savvy with a grinder, you’ll be good). Pictures shown include both preloaded spring spacer and strut spacer on the top hat. Needed alignment big time, highly recommend. Tires - went with 285/70r18 (33.7 x 11.2) on -12mm offset with very minor rubbing that should be fixed with some strategically placed zip-ties on the wheel well but if I went any bigger I could see a lot of rubbing. Overall extremely happy despite a little rougher ride as expected w/ the preloaded spring spacer, gained 3” height and rear sits 0.75” higher than front. Hopefully this helps anyone else looking to do something similar.
 

Attachments

  • 18C05F3A-E474-4F04-A105-3A144FEAFA36.webp
    18C05F3A-E474-4F04-A105-3A144FEAFA36.webp
    640.6 KB · Views: 319
  • 0925DF82-1256-4C1F-9F04-63E82CA716D6.webp
    0925DF82-1256-4C1F-9F04-63E82CA716D6.webp
    587.4 KB · Views: 316
  • 702320FA-E03F-4F46-BA79-C40B3D888067.webp
    702320FA-E03F-4F46-BA79-C40B3D888067.webp
    243.4 KB · Views: 316
Just finished installing Readylift 2.0 SST, Fox 2.0 (front), and Bilstein 5160’s (rear). Had a terrible time getting the stock ball joints out due to the taper and not wanting to crack the aluminum casting w/ metal hammer (went with metal hammer anyway and everything came right out). If you’re methodical with your work, will probably take 8 hours assuming disassembly being a b$tch but my truck is also 3 years old too. I tried installing without the preload spring spacer first but you lose 1” of height without it. If installing Fox 2.0’s - you’ll need to grind down the supplied plastic spring seat to fit the ready lift preloaded spacer, you can kind of see it in the picture but not super clear (readylift 2.0 SST is meant for Rancho shocks but if you’re savvy with a grinder, you’ll be good). Pictures shown include both preloaded spring spacer and strut spacer on the top hat. Needed alignment big time, highly recommend. Tires - went with 285/70r18 (33.7 x 11.2) on -12mm offset with very minor rubbing that should be fixed with some strategically placed zip-ties on the wheel well but if I went any bigger I could see a lot of rubbing. Overall extremely happy despite a little rougher ride as expected w/ the preloaded spring spacer, gained 3” height and rear sits 0.75” higher than front. Hopefully this helps anyone else looking to do something similar.
Looks good. Can you get a pic of how much that setup pokes out of the wheel well ?
 

Looks good. Can you get a pic of how much that setup pokes out of the wheel well ?
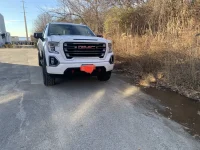
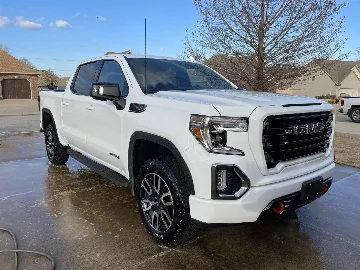
Side of tire protrudes 2”. This tire and wheel combination literally looks exactly the same as when I had stock wheels with 2” wheel spacers. The fender flares are EGR and protrude 2” so it’s perfectly flush which is what I was looking for. Tread width almost looks the same as the stock Duratrac but the overall width is larger. Feel free to message me if you want any very detailed explanations into the setup and install tips/tricks/concerns.
 

Attachments

  • 5665AFBE-5371-4D78-8C48-55F594379283.webp
    5665AFBE-5371-4D78-8C48-55F594379283.webp
    545.8 KB · Views: 239
  • 64425D8B-A47A-4A67-A728-D4CEDBBC21F1.webp
    64425D8B-A47A-4A67-A728-D4CEDBBC21F1.webp
    446.7 KB · Views: 230
Did you have to get the dealership to transfer data (mileage and such) to the new display??? That actually looks very nice!!!! Just wondering how much trouble to get mileage and information transferred over to the new one, or does it automatically pick it up from the computer??

The gauge cluster is "dumb" unlike years ago. They are just a lcd screen and the "smarts" are contained in the modules (computers).

The swap is plug and play.
 

The gauge cluster is "dumb" unlike years ago. They are just a lcd screen and the "smarts" are contained in the modules (computers).

The swap is plug and play.
Gemarsh, thanks for getting back. I will check with dealership and see what they sale them for. I see there are a couple of aftermarket company's that list them as available..
 

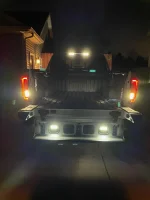
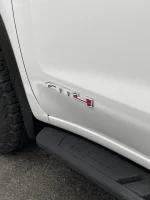
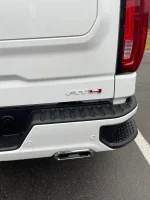
I installed my Boost Auto cargo light and fog light mods. I also installed LED lights for the steps. I installed some emblem overlays to match my GMC emblem.

Marc
 

Attachments

  • Multipro gate lights2.webp
    Multipro gate lights2.webp
    107.2 KB · Views: 198
  • AT4 overlay2.webp
    AT4 overlay2.webp
    107.9 KB · Views: 208
  • AT4 overlay1.webp
    AT4 overlay1.webp
    140.9 KB · Views: 192
I installed my Boost Auto cargo light and fog light mods. I also installed LED lights for the steps. I installed some emblem overlays to match my GMC emblem.

Marc
Is there constant power in the tailgate? I might like to wire some up with a switch right there. Could be more of a work light than anything else and super easy to wire up if there is power.
 

Is there constant power in the tailgate? I might like to wire some up with a switch right there. Could be more of a work light than anything else and super easy to wire up if there is power.
I'm sure there is with the buttons for the multi pro gate as well as light for the key pad. I'm sure there would be a 12v source to tap into if you wanted to.

Marc
 

New Posts

Most reactions

Back
Top