What did you do to your AT4 today?

how did you get it back?
Page 15 of my manual...

Screenshot_20230918_214749_Adobe Acrobat.jpg
 

Hi All
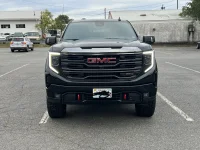
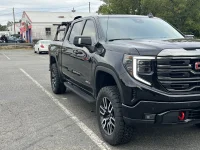
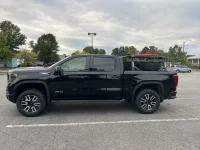
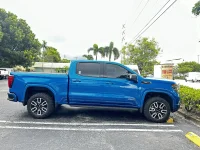
I had my23 badges and exhaust tips converted to black , ie AT4’s & GMC’s and had wheel’s black powder coated, and added the S & B air filter and cat back exhaust . Sounds and runs great.
Wheels look great, how much did it cost to have them powder coated?
 

Picked it up from the shop with the new tires, spacers and SST kit. Looks great very little rub at full lock.
 

Attachments

  • IMG_6996.jpeg
    IMG_6996.jpeg
    461.8 KB · Views: 133
  • IMG_6997.jpeg
    IMG_6997.jpeg
    474 KB · Views: 137
  • IMG_6993.jpeg
    IMG_6993.jpeg
    453.5 KB · Views: 128
  • IMG_6994.jpeg
    IMG_6994.jpeg
    482.3 KB · Views: 131
Had my film guy install PPF on the A, B & C pillars where the gloss black was already showing scratches and wear with less than 6k miles. It really makes a big difference, looks better than it did when it was brand new.

Also installed the matte screen protector...highly recommend doing both.View attachment 5118View attachment 5119View attachment 5120View attachment 5121View attachment 5122View attachment 5123
Any link for the matte screen protector? Fitment looks awesome. Also what are the specs on your wheels and is there any rubbing or trimming needed?
 

I'm digging that. Where did you find them?
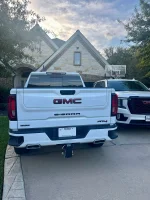
My wife got the mirror caps from our local GM dealer prepainted in summit white to match my truck. Still very happy with them. The tech at the dealership though said they would need to "break" my original black ones to get them off and change so I said never mind and did the swap myself at home. Pretty easy and straight forward.
 

Added the Duarmax badge on the tailgate in matte black. Got it on Amazon for $20. I like it.
 

Attachments

  • IMG_8907.jpeg
    IMG_8907.jpeg
    397.2 KB · Views: 118
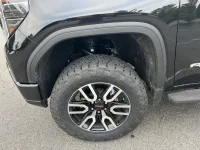
Mud flap mod, was getting A little rub with 265 60 R20 Stock wheels with .75 spacers(toto OC AT3)
1. Removed the 1 bolt
25BD24B9-E560-4B21-BB8B-11D1F199EDEF.jpeg
AD8F7043-51F6-4DB8-ABAC-A0185EDE244C.jpeg
B92D91F4-E37C-4BD0-8B36-3D8394E0AACA.jpeg
1DD1C29C-59A0-4CDA-9B29-4C094CE3D915.jpeg
and three screws holding it on.
2. Use tin snips remove the parts where it was clearly rubbing, and sanded the edges with a Drexel. I did up cutting out One of the panel screw portions as it was getting some rub.
3. Reinstall, test drive, that side is done. Need to do the driver side now, which is much smaller and infrequent except full lock turns off road… where trucks should be.

No rub on this side, time to do driver side.
 

Back
Top