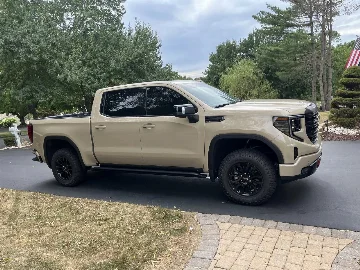
Alibaba Camper Shell

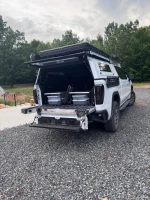
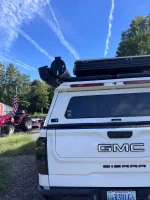
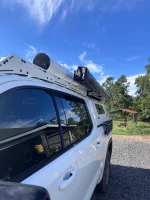
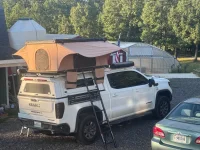
Added the roof top tent 270 Degree awning and shower cube this week .

2026-06-25_21-23-51.webp
 

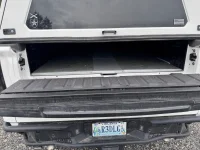
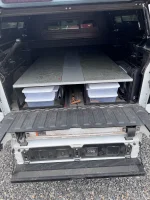
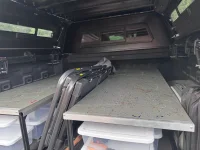
No where as nice as a decked drawer system but its a fraction of the cost. It has a ton of totes of various sizes tucked away under the platform. I like that its almost level with the split gate and keeps things hidden from prying eyes. Center section pops up for tables and such to slide into. I used 80/20 extruded aluminum for the frame with a 1/2 plywood top. Its 2 individual sections so I can take it out at camp and use as a cooler riser. I'm thinking I have about $300 into it inc/paint. Son picked the base color and grand daughter splatter painted the tops.
 

Attachments

  • image0(29).webp
    image0(29).webp
    245 KB · Views: 48
  • image1(24).webp
    image1(24).webp
    354.5 KB · Views: 50
  • image1(25).webp
    image1(25).webp
    544.5 KB · Views: 44
  • image0(30).webp
    image0(30).webp
    195.9 KB · Views: 46
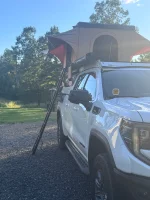
Just some pics as I do my final tweaks to the awning and changing room(is there ever a final tweak :-)). I bought some parts to construct a stand off for my ladder and they should be coming via amazon. My side racks stick out and interfere with the ladder deployment.
image5(5).webp
image4(10).webp
image3(12).webp
image2(20).webp
image0(31).webp
 

Added the rod tube which was a very simple product. PVC pip bought at Lowes and end caps on Amazon
 

Attachments

  • image1(28).webp
    image1(28).webp
    243.7 KB · Views: 22
  • image0(33).webp
    image0(33).webp
    237.3 KB · Views: 21
No where as nice as a decked drawer system but its a fraction of the cost. It has a ton of totes of various sizes tucked away under the platform. I like that its almost level with the split gate and keeps things hidden from prying eyes. Center section pops up for tables and such to slide into. I used 80/20 extruded aluminum for the frame with a 1/2 plywood top. Its 2 individual sections so I can take it out at camp and use as a cooler riser. I'm thinking I have about $300 into it inc/paint. Son picked the base color and grand daughter splatter painted the tops.
And here are a couple pics with tent deployed. I have $3500 in total invested into my rig. The camper shell if bought in the US would have been 3-7K depending on options by itself. Going the Temu/Ali baba route saved me tons. It allows me to try out the overland hobby without breaking the bank. I could have save quite a bit more by keeping it black.
 

Attachments

  • image0(34).webp
    image0(34).webp
    344 KB · Views: 38
  • image1(29).webp
    image1(29).webp
    245.8 KB · Views: 21
Last edited:
And here are a couple pics with tent deployed. I have $3500 in total invested into my rig. The camper shell if bought in the US would have been 3-7K depending on options by itself. Going the Temu/Ali baba route saved me tons. It allows to to try out the overland hobby without breaking the bank. I could have save quite a bit more by keeping it black.
Nice job man! A couple little mistakes don't matter at all. I get the ocd part because it would bug me a bit too, but the important parts are that:
1) you did it yourself (obviously not the body work on that panel or the painting), and
2) you saved a ton of money!

For not being a professional who does that type of install on the regular, you did an excellent job. You should be proud!

 

Nice job man! A couple little mistakes don't matter at all. I get the ocd part because it would bug me a bit too, but the important parts are that:
1) you did it yourself (obviously not the body work on that panel or the painting), and
2) you saved a ton of money!

For not being a professional who does that type of install on the regular, you did an excellent job. You should be proud!
Shark- This comment made my night. Huge, thank you. My biggest expense is lights. Putting money aside for an upper 50" white light bar from Baja. Don't know if I want to continue with the amber or go white. Any tips to shave a few dollars here?
 

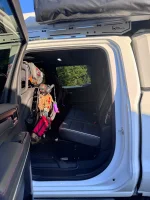
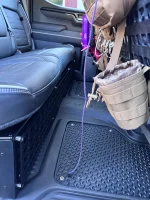
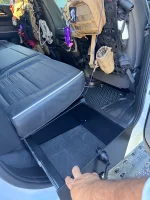
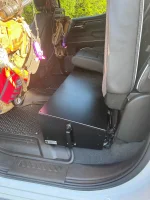
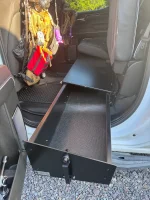
Not the cheapest mod but its up there with most functional. Installed a Chevy/GMC Under Seat Storage Toolbox w/ Dual Drawers from N-Charge Fabrication. I opted for the front MOLLE panel and I like how it ties into the bedside panels. No more moving crap or unloading the kids to get under the seat. Bonus- the drawers lock!!
 

Attachments

  • image4(11).webp
    image4(11).webp
    198.7 KB · Views: 27
  • image3(13).webp
    image3(13).webp
    276.2 KB · Views: 31
  • image1(30).webp
    image1(30).webp
    258.5 KB · Views: 30
Not the cheapest mod but its up there with most functional. Installed a Chevy/GMC Under Seat Storage Toolbox w/ Dual Drawers from N-Charge Fabrication. I opted for the front MOLLE panel and I like how it ties into the bedside panels. No more moving crap or unloading the kids to get under the seat. Bonus- the drawers lock!!
Let's see the driver's side drawer!
 

Nice, I was hoping that was the case. Does it seem stout enough to handle a full drawer of tools or such?
Its sturdier than a craftsman drawer. Giving it a look over maybe upgrade the slides if you were loading it down but a few shadow trays of essentials is a non issue. The passenger side seems small .. good for straps and such. The driver side I was thinking my SBR and magazines. I haven't measured yet to see if it would fit my 45/70 lever action
 

Just wanted to chime in that I’ve really enjoyed reading about your build. Your truck is really unique and makes me want to take a long trip across some remote territory.
 

Just wanted to chime in that I’ve really enjoyed reading about your build. Your truck is really unique and makes me want to take a long trip across some remote territory.
I know I built this truck for me but I truly appreciate others comments. I didn't want to be in a 1000's different threads so I just post all of my stuff to this one. Thank you so much for your post. It's another that made my day.
 

Most reactions

Back
Top