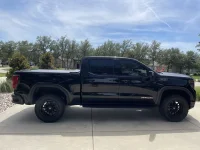
I LOVE the sound. I just had the muffler replaced, kept the resonators. Not to loud, but does give it a V8 growl!!!!What exhaust are you going with? Thanks
Borla 400844 Sbc Hot 350 383 https://a.co/d/fgSBdW6
I LOVE the sound. I just had the muffler replaced, kept the resonators. Not to loud, but does give it a V8 growl!!!!What exhaust are you going with? Thanks
I removed the "Rough Country" labels and painted the steps (from backside to just give it a little color to match the red)Which manufacturer of after market running boards did you go with? Model? link? Thanks.

Here is a link to the running boards on my first AT4...Which manufacturer of after market running boards did you go with? Model? link? Thanks.
") ' https://www.at4forum.com/threads/running-boards-pics-please.326/post-2277
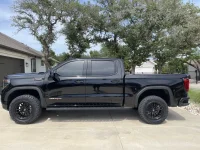
' https://www.at4forum.com/threads/running-boards-pics-please.326/post-2277What did that cost just to have the muffler replaced? ThanksI LOVE the sound. I just had the muffler replaced, kept the resonators. Not to loud, but does give it a V8 growl!!!!
Borla 400844 Sbc Hot 350 383 https://a.co/d/fgSBdW6
$130. To cut original muffler off then add about a foot of 3-in stainless steel mandrel bent exhaust pipe. (Stock muffler is huge).What did that cost just to have the muffler replaced? Thanks
Totally agree. I was feeling the same way (a bit nervous about my color choice), I am very happy I ordered it also. Looks great in personCongrats!


Your tint looks great! What % did you do and did you do front only?Got some tints on my new 2022 AT4 and installed a roll n lock bed cover that I love!
I went with 25% for front since darkest legal in Texas. I think the rear sides and back glass are 15%. Looks great but guys that do full limo look pretty sweet!Your tint looks great! What % did you do and did you do front only?
Ohio, you got your truck dirty?! Gross!!I filled it with mulch today. twice. Oh, thats not what you mean here...sorry, carry on
View attachment 1631


 www.gm-trucks.com
Good job!I didn’t do it “today” but finally getting around to posting. I added the secondary cargo light button to the bed. I followed this-
Secondary Cargo Switch in the bed
Looking to see if there is a mod to add a cargo switch in the bed that functions EXACTLY like the cargo switch in the cab. Meaning how it turns on all the lights and time limit designed by GM. I am aware of Boost Auto bed light module but that's not the function I want. Also aware of using a swit...
It turned out well and works as advertised. I went a step further and jumpered from the cargo light pin to the task light pin (pin 18 and 19 respectively, on the blue connector under the dash) so cargo and task come on at the same time. Just a little extra light while camping. Only very minor issue is; because of the order of operation with the task lights (both/left/right) the lights can get out sync. So I have to be careful to wait at least 5 seconds before turning them off so they all turn off and not cycling through the task light options. Not a big deal since I’ll almost always have them on longer than that.
I did use the curt adapter in the original post because I plan on adding extra lights down the road eventually. I do have heat shrink for the back side of the button, but just haven’t had time to install it. I’m not a huge fan of just electrical tape even though it’s only ground.View attachment 1645View attachment 1646
Very cleanlyI didn’t do it “today” but finally getting around to posting. I added the secondary cargo light button to the bed. I followed this-
Secondary Cargo Switch in the bed
Looking to see if there is a mod to add a cargo switch in the bed that functions EXACTLY like the cargo switch in the cab. Meaning how it turns on all the lights and time limit designed by GM. I am aware of Boost Auto bed light module but that's not the function I want. Also aware of using a swit...
It turned out well and works as advertised. I went a step further and jumpered from the cargo light pin to the task light pin (pin 18 and 19 respectively, on the blue connector under the dash) so cargo and task come on at the same time. Just a little extra light while camping. Only very minor issue is; because of the order of operation with the task lights (both/left/right) the lights can get out sync. So I have to be careful to wait at least 5 seconds before turning them off so they all turn off and not cycling through the task light options. Not a big deal since I’ll almost always have them on longer than that.
I did use the curt adapter in the original post because I plan on adding extra lights down the road eventually. I do have heat shrink for the back side of the button, but just haven’t had time to install it. I’m not a huge fan of just electrical tape even though it’s only ground.View attachment 1645View attachment 1646