Building My Weekend Adventure Rig

3WAVSND

Member
Joined
Jun 23, 2023
Messages
19
Media
28
Reaction score
61
Location
Indiana, PA
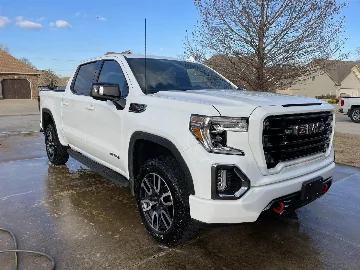
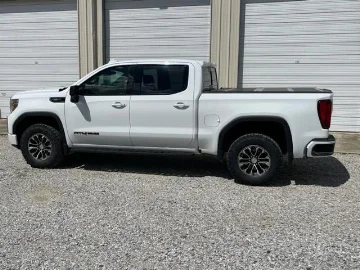
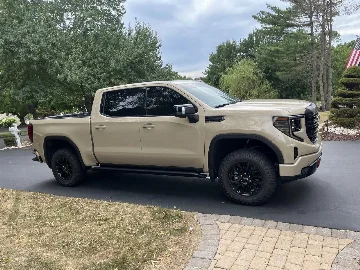
I figured I'd share my current SmartCap build on my 2025 Sierra 2500HD AT4.

The first project was building a roof rack using black TNutz aluminum extrusion mounted to the SmartCap rails. I wanted a very low-profile look and honestly didn't love many of the roof rack options available. The DIY TNutz setup allowed me to keep everything tight to the roof while still giving me the flexibility to customize bar spacing and mounting locations. (Not my idea, theres a number of videos and posts on this style rack)

One of the main reasons for building the rack was to support an OpenRoad 270+ awning. I use the truck for scuba diving, airsoft events, and truck camping, so having quick shade and weather protection was important.

After finishing the roof rack, I moved on to the power system.

I installed two Renogy 100W flexible solar panels on the roof and connected them to a Renogy 50A DC-DC charger with MPPT charging a Renogy 100Ah Smart Lithium battery.

I was able to fit the battery in the space beside my Decked system. I did have remove the factory tie down in order to slide the battery into position. I still need to come up with a low profile tie down solution that will allow me to secure the Decked system while still being able to remove the battery if it ever needs replaced.

The Renogy charger is mounted under the Decked Stash Box, and I installed a fused distribution block above it for future accessories and power circuits.

For charging from the truck, I ran 4 AWG cable from the starting battery to the charger. I also ran 1/0 AWG cable to the fused distribution block and left provisions for a second battery on the opposite side, which would be connected with additional 1/0 AWG cable if I decide to expand the system later.

The two Renogy 100W flexible panels are mounted using 30 lb magnets on each eyelet, and the wiring is routed through the SmartCap vent down to the charge controller.

Future plans include an ICECO fridge, a Cybertake S2 air conditioner, onboard air, and possibly a second lithium battery if I find I need additional capacity, probably will with the AC unit..

A few photos of the setup are attached. Happy to answer any questions.
IMG_3377.webp


IMG_3404.webp

IMG_3398.webp
IMG_3402.webp

IMG_3394.webp
IMG_3395.webp
IMG_3390.webp
IMG_3582 2.webp
 

Last edited:
I finally had a free Saturday and tackled onboard air.


I ended up putting a generic ARB-style twin compressor behind the passenger side fender using the bracket that came with it.


I looked at mounting it under the hood, but there just isn’t any room on these trucks. I also didn’t want it underneath where it’d constantly get blasted with water, mud, and road salt. Behind the fender seemed like a good compromise since it’s protected but still some what easy to access if I ever need to service it.

Removing the fender wasn’t bad. It took a little time, but it was all pretty straightforward.

The only modification I had to make was relocating the factory horns a little lower since they occupied the space where I wanted the compressor.

For the plumbing, I used a short braided stainless line coming off the compressor to help deal with the heat, then switched over to 3/8” DOT nylon air line for the run under the truck. Routing the airline was probably the most time-consuming part of the project. I also mounted both the air chuck and the compressor switch inside the fuel door, which has worked out really well. It’s protected from the weather and makes it easy to hook up without crawling under the truck.

The whole install took about half of a Saturday.

Right now the system is mainly for airing down and back up after camping and trail rides. I’m using it with a 200” Morrflate hose kit, and it’s been working great. One of the pictures is from airing the truck back up after being out on the trails.

IMG_3943 2.webp
IMG_3947 2.webp
IMG_3952 2.webp
IMG_4075.webp
IMG_4029.webp
 

I figured I'd share my current SmartCap build on my 2025 Sierra 2500HD AT4.

The first project was building a roof rack using black TNutz aluminum extrusion mounted to the SmartCap rails. I wanted a very low-profile look and honestly didn't love many of the roof rack options available. The DIY TNutz setup allowed me to keep everything tight to the roof while still giving me the flexibility to customize bar spacing and mounting locations. (Not my idea, theres a number of videos and posts on this style rack)

One of the main reasons for building the rack was to support an OpenRoad 270+ awning. I use the truck for scuba diving, airsoft events, and truck camping, so having quick shade and weather protection was important.

After finishing the roof rack, I moved on to the power system.

I installed two Renogy 100W flexible solar panels on the roof and connected them to a Renogy 50A DC-DC charger with MPPT charging a Renogy 100Ah Smart Lithium battery.

I was able to fit the battery in the space beside my Decked system. I did have remove the factory tie down in order to slide the battery into position. I still need to come up with a low profile tie down solution that will allow me to secure the Decked system while still being able to remove the battery if it ever needs replaced.

The Renogy charger is mounted under the Decked Stash Box, and I installed a fused distribution block above it for future accessories and power circuits.

For charging from the truck, I ran 4 AWG cable from the starting battery to the charger. I also ran 1/0 AWG cable to the fused distribution block and left provisions for a second battery on the opposite side, which would be connected with additional 1/0 AWG cable if I decide to expand the system later.

The two Renogy 100W flexible panels are mounted using 30 lb magnets on each eyelet, and the wiring is routed through the SmartCap vent down to the charge controller.

Future plans include an ICECO fridge, a Cybertake S2 air conditioner, onboard air, and possibly a second lithium battery if I find I need additional capacity, probably will with the AC unit..

A few photos of the setup are attached. Happy to answer any questions.
Really nice build. I like how you kept the roof rack low-profile while still leaving room to customize the mounting points. The way you’ve integrated the two 100W panels, DC-DC/MPPT charger, and 100Ah battery also makes the system easy to expand later.

The setup makes a lot of sense for camping and longer trips, especially with the fridge and AC planned. I’d be interested to see how much real-world solar production you get from those flexible panels once everything is being used regularly.

I’ve also been looking into solar panel kits and portable solar power generators for supplemental power, so this is a great example of how a properly planned solar setup can be integrated into a truck without taking up much usable space. Great work documenting the build.
 

I finally had a free Saturday and tackled onboard air.


I ended up putting a generic ARB-style twin compressor behind the passenger side fender using the bracket that came with it.


I looked at mounting it under the hood, but there just isn’t any room on these trucks. I also didn’t want it underneath where it’d constantly get blasted with water, mud, and road salt. Behind the fender seemed like a good compromise since it’s protected but still some what easy to access if I ever need to service it.

Removing the fender wasn’t bad. It took a little time, but it was all pretty straightforward.

The only modification I had to make was relocating the factory horns a little lower since they occupied the space where I wanted the compressor.

For the plumbing, I used a short braided stainless line coming off the compressor to help deal with the heat, then switched over to 3/8” DOT nylon air line for the run under the truck. Routing the airline was probably the most time-consuming part of the project. I also mounted both the air chuck and the compressor switch inside the fuel door, which has worked out really well. It’s protected from the weather and makes it easy to hook up without crawling under the truck.

The whole install took about half of a Saturday.

Right now the system is mainly for airing down and back up after camping and trail rides. I’m using it with a 200” Morrflate hose kit, and it’s been working great. One of the pictures is from airing the truck back up after being out on the trails.

View attachment 38473View attachment 38474View attachment 38475View attachment 38476View attachment 38477
A very cool install indeed. 1/2 day to do it..Wow!
 

Where did you get that quick-disconnect cover? Although I installed mine at the cleanest part of the truck after a mud-fight, I still want a cover! Thanks!
20260920_131904.webp
 

  • Like
Reactions: WVI

New Posts

Most reactions

Back
Top